Install Windows 8.1 on Oracle VirtualBox
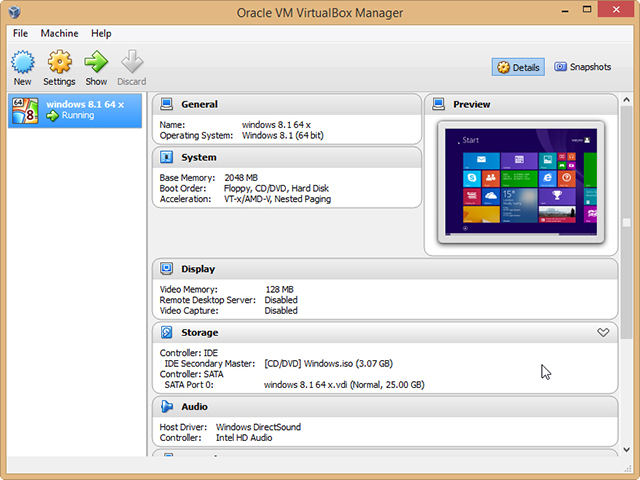
Last week my colleague Mihaita Bamburic explained how to install the freshly released Windows 8.1 in VMware Player and Workstation, and I wanted to follow that up by showing how to set up the new OS in my personal favorite virtualization software -- Oracle VirtualBox.
There are many reasons why you may want to try out Windows 8.1 before committing to it as your primary operating system -- if you used Windows 8 and hated it, you may want to see exactly how much better the updated release is. If you’re thinking of upgrading from an old OS but aren’t sure about the Modern UI, this a good way of trying it out first.
The process is very simple -- all you need is a copy of Oracle VM VirtualBox and the Windows 8.1 ISO. If you have a Windows 8 key you can download the required image file by following my instructions here. The ISO can also be downloaded from MSDN or TechNet, or created from a Windows 8.1 DVD if you have one.
If you don’t have a Windows 8 key, or an MSDN or TechNet subscription, you can download Windows 8.1 Enterprise for a 90-day evaluation.
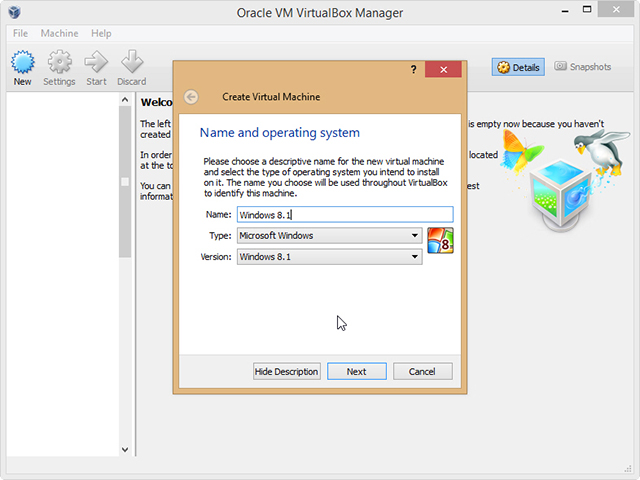
To set up Windows 8.1 in VirtualBox, launch the software and click New in the Manager window. In the Create Virtual Machine dialog box enter "Windows 8.1" as the name of the operating system. VirtualBox will fill in the rest of the details. If you have an ISO of the 64-bit version of the OS, name it "Windows 8.1 64" and VirtualBox will switch to the 64-bit version. Hit Next.
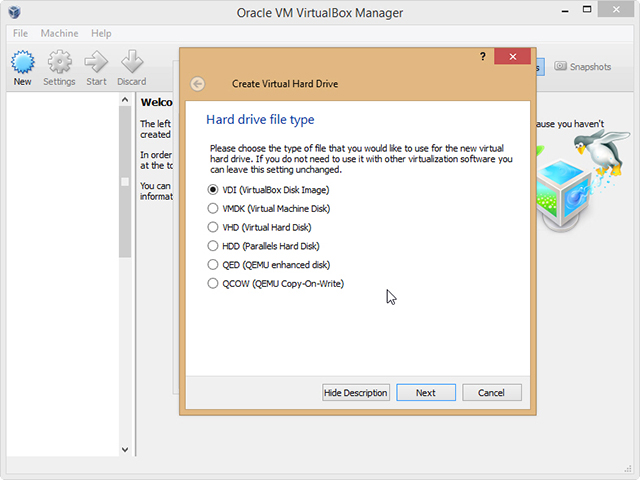
Set the Memory Size. The recommended figure should be fine. On the following screen choose to "Create a virtual hard drive now" and click Create. Accept VDI (VirtualBox Disk Image) as the hard drive file type. You’ll be asked if you want the new virtual hard drive to be dynamic (it will resize as required) or a fixed size. The latter option is faster, so select that.
Enter in a name for the new virtual drive ("Windows 8.1") and choose a size for it. The default choice should be fine. Click Create and VirtualBox will begin building the drive.
When done, click the Start button in the Manager. In the "Select start-up disk" window, click the folder icon and navigate to the Windows 8.1 ISO.
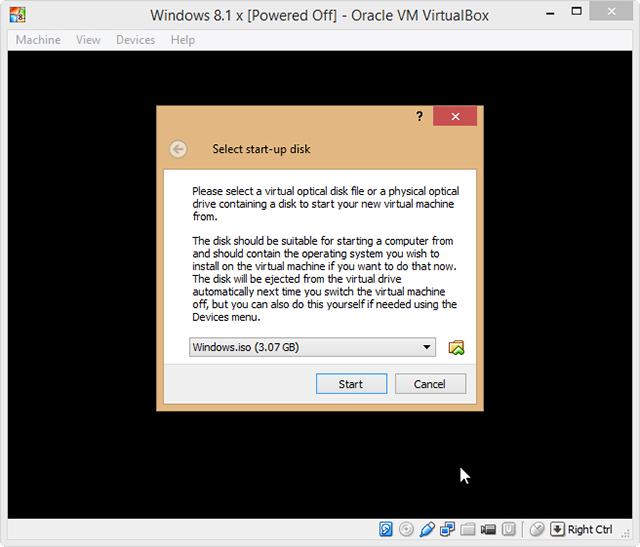
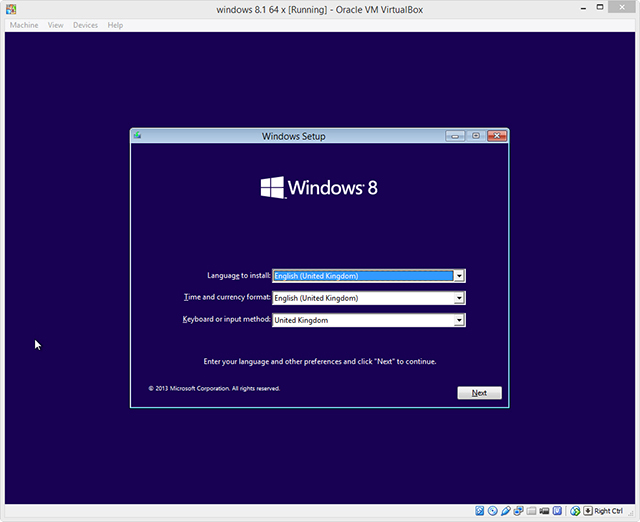
Click Start and Windows 8.1 should begin to load. Select your language settings, then click the "Install now" button. Enter your product key and accept the license terms. Choose the "Custom: Install Windows only (advanced)" option. Click Next, and the installation process will begin, rebooting as necessary.
When that’s done, personalize the OS by picking a color and entering a PC name, and then choosing to use the express settings or customizing things further. Set up a Microsoft Account if you don’t already have one, sign in with it, and then finalize everything else.
Click View in VirtualBox to change the window size to Fullscreen or Scaled. The easiest way to shut down Windows 8.1 is to click the X in top right corner and select "Power off the machine".
Troubleshooting
Depending on your PC hardware and configuration, VirtualBox may fail to install Windows 8.1 and will simply generate an 0x0000005d error and suggest you reboot your (virtual) PC. Follow the instructions and it will fail again. And again.
I’ve found a couple of solutions in the past, but my favored choice is to go to System Properties on the host (not the virtual) PC, click the Advanced tab and click Settings under Performance. Select the Data Execution Prevention tab and change the setting from "Turn on DEP for essential Windows programs and services only" to "Turn on DEP for all programs and services except those I select".
OK that, restart your system and this time Windows 8.1 should install just fine in VirtualBox.