How to install Android L preview on your Nexus 5, 7
At the I/O 2014 conference, Google showcased the latest version of Android, known only as L until its official launch later this year. Compared to its predecessor, KitKat, it comes with 64-bit support, design changes, the ART runtime running the show, tightened security, battery life and performance improvements, notifications tweaks, new APIs and more.
Android L may not yet be ready for prime time, but a preview version is now available for Nexus 5 and Nexus 7 (2013 Wi-Fi model), giving users the option to get comfortable with the slew of changes it introduces. Here is how you can download and install it.
Backup First!
Because we are talking about an unstable release, I recommend performing a backup before proceeding any further. On the off-chance something goes wrong you may lose all the data stored on the device (one of the methods I detail below definitely involves it). Better safe than sorry.
Requirements
As with any other version of Android, to install the L preview you need a couple of things (downloaded) to get started:
- The Android SDK Tools, that you can download from Google Developers (check the corresponding section under VIEW ALL DOWNLOADS AND SIZES);
- The Android L preview factory image for your Nexus 5 and/or 2013 Wi-Fi Nexus 7, that you can also download from Google Developers;
- A program that can handle archived files, like 7-Zip or WinRAR (either one is fine; links to the official download pages are included).
It is best to store the downloaded Android L preview factory image in a folder that is easily accessible, in the root of the drive. I will use a folder called Root on the C drive (the default drive for Windows installs), for the purpose of this guide. The path for the folder, in this case, is C:\Root. If you choose the same one, the steps will be easier to follow.
Preparations
Install the archiver and Android SDK Tools. Then open Android SDK Tools Manager and select the following items to download and install:
- Android SDK Platform-tools -- it contains tools needed for the process;
- Google USB Drivers -- it contains the correct drivers for your Nexus device.
This is to ensure that your PC can communicate with your Nexus device (this means commands and file transfers working).
Now go to the folder where Android SDK Platform-tools is located (in my case, its path is C:\Program Files (x86)\Android\android-sdk\platform-tools) and copy the following files to the Root folder:
- AdbWinApi.dll;
- AdbWinUsbApi.dll;
- fastboot.exe.
While in the Root folder, extract the Android L preview factory image to the same location. This will create a new folder inside Root, which name depends on the device. In case of my 2013 Wi-Fi Nexus 7 it is razor-lpv79. Open the folder and copy all of its contents to Root.
Now, you have to install the correct drivers for your Nexus 5 and/or Nexus 7. Here is what you need to do:
- After connecting the device to the PC, power the Nexus off.
- Turn on your device in fastboot mode; the key combination for your device is either volume down + power (2013 Wi-Fi Nexus 7, codenamed flo/razor) or volume up + volume down + power (Nexus 5, codenamed hammerhead).
- From Device Manager (Computer -> Properties -> Device Manager) identify your device (it will show up with a yellow exclamation mark icon).
- Right click on it, select Update Driver Software and then select Browse my computer for driver software.
- Select Let me pick from a list of device drivers on my computer.
- From Have Disk... option manually install the android_winusb.inf driver (in my case, its location is C:\Program Files (x86)\Android\android-sdk\extras\google\usb_driver). Accept any prompts that may appear.
- Select the Android ADB Interface option when given the option. Accept any prompts that may appear.
Testing the Connection
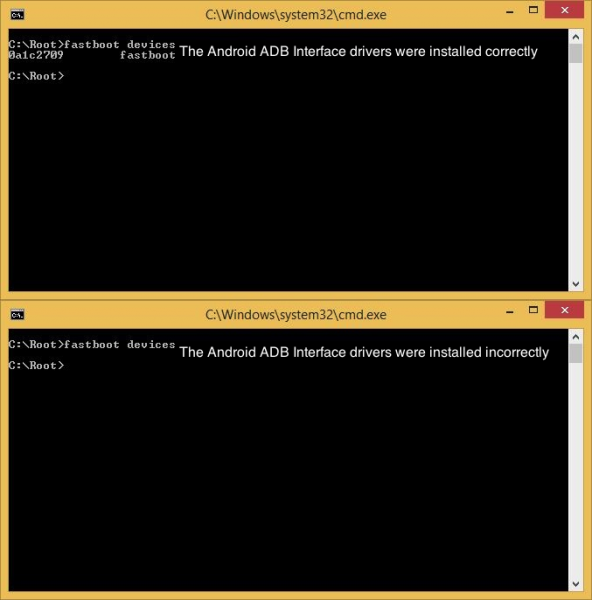
If you have followed the aforementioned steps, your PC is able to properly communicate with your Nexus device. To test this, enter fastboot mode, open a command prompt window in the Root folder (while pressing the Shift key, right click inside it and select Open command window here) and use the fastboot devices command.
If everything is going according to plan, you will see the response in the first window below; otherwise -- if the drivers were not installed correctly -- the device (its specific string of numbers and letters) will not show up:
Clean Install
This scenario involves deleting everything stored on the device. If you have not yet performed an upgrade, now is the time to do so. Follow the next steps to install the Android L preview:
- Connect your Nexus device to the PC in fastboot mode, if you have not done so already.
- Open a command prompt in the Root folder.
- (If you have already unlocked the bootloader, you can skip past this step.) Use the fastboot oem unlock command to unlock the bootloader. A prompt will show up on your Nexus device; use the volume keys to select Yes and press the power button to validate. This command will erase all personal data from the device.
- Use the flash-all.bat command to perform a clean install of the Android L preview. Alternatively, you can also open the file with the same name from the Root folder.
- Optional: use the fastboot oem lock command while in fastboot mode to re-lock the bootloader. This will not alter the state of the data stored on the device. I recommend keeping the bootloader unlocked, at least during your time of testing this build.
Upgrade
This scenario does not involve losing data, but only if the bootloader was previously unlocked; also, there is no guarantee that the upgrade will go smoothly as this is not a method Google wants us to use. Still, if you want to upgrade to the Android L preview, here is what you need to do:
- Using Notepad, open the flash-all.bat file (or, right click on it and select Edit). To avoid any issues make sure that your Nexus device is disconnected from the PC beforehand.
- Identify the fastboot -w update sequence.
- Remove the -w so the sequence is fastboot update. Save the changes.
- Connect your Nexus device to the PC in fastboot mode.
- Open the flash-all.bat file in the Root folder.
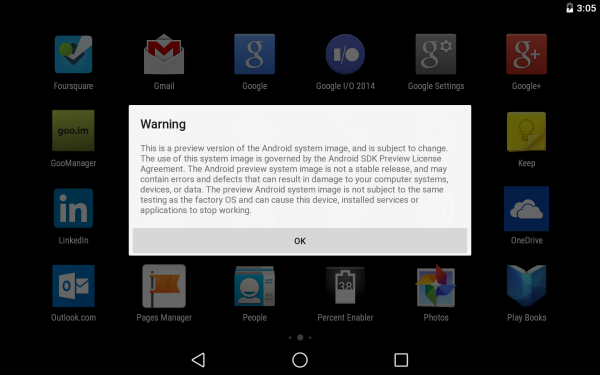
All Done!
Your device is now running the Android L preview. Be aware that you may encounter bugs due to it being in an earlier stage of development. In case you wish to go back to KitKat, you can apply the same steps as detailed in this article, but using a KitKat factory image instead. Alternatively, you can check this how-to guide designed specifically for the task.