How to use Windows Sandbox to open files in a secure environment

Windows Sandbox is a built-in feature of Windows 10 and Windows 11. Its main purpose is to provide a safe environment for running applications. Anything that is executed in the sandbox, e.g., a software that is installed, remains trapped inside. It can’t break out and affect the "real" operating system.
As a consequence, malware, spyware and other unwanted and undesirable code, can’t infect the system or pull data from it.
System Requirements
Windows Sandbox has the following system requirements:
- Windows 10 Pro, Enterprise or Education build 18305 or Windows 11 (Windows Sandbox is currently not supported on Windows Home edition)
- AMD64 or (as of Windows 11 Build 22483) ARM64 architecture
- Virtualization capabilities enabled in BIOS
- At least 4 GB of RAM (8 GB recommended)
- At least 1 GB of free disk space (SSD recommended)
- At least two CPU cores (four cores with hyperthreading recommended)
Installation
Installation of Windows Sandbox is straightforward in most cases:
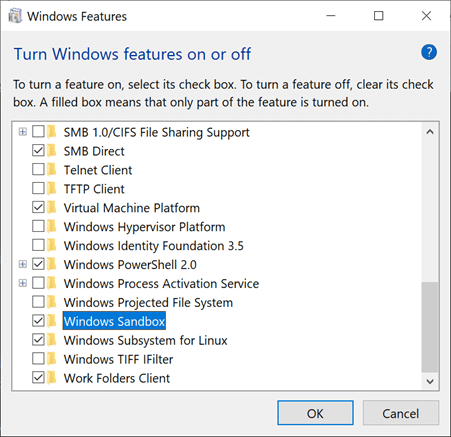
- Open the Start Menu, type Turn Windows Features on or off, and select the result.
- Locate Windows Sandbox in the Windows Features window that opens and check its box to enable it.
- Select OK, and the installation process starts automatically.
- A restart of the system is required to complete the process.
Making use of Windows Sandbox
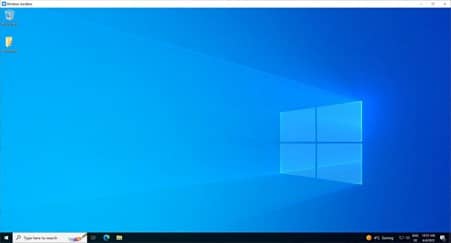
Use the search to run Windows Sandbox. This opens a dedicated window that looks like the default Windows desktop.
To run an executable file inside Windows Sandbox, just copy it to the window. Note that drag & drop is not supported, which means that you need to use Ctrl-C to copy and Ctrl-V to paste the file. Once inside the Sandbox, run the file.
While that is useful already, you may notice that you can’t execute any non-executable files that are not already inside the sandbox this way.
Thankfully, there is an option to map local folders, so that their contents become available.
Here is a basic configuration file that you need to save as downloads.wsb on the local system.
<Configuration>
<MappedFolders>
<MappedFolder>
<HostFolder>C:\Users\USERNAME\Downloads</HostFolder>
<ReadOnly>true</ReadOnly>
</MappedFolder>
</MappedFolders>
</Configuration>
Note: please replace USERNAME with the local username.
Once done, double-click on the wsb file to launch the Sandbox. The mapped folder is then available on the Desktop inside the sandbox environment. Using it, you may then launch any file that is in that folder, e.g. a PDF document or images.
The sandboxed environment has no access to installed programs on the host system. Some files may not open if no dedicated application is installed that supports it.
Windows Sandbox’s configuration file supports additional options, which Microsoft has documented here. Among the options are to share Clipboard entries, to run the sandbox in Protected client mode, which adds extra protections, or to disable networking.
All in all, Windows Sandbox is a useful tool in the arsenal of Windows 10 and 11 users who want to run dangerous or suspicious files in a safer environment.
Image Credit: Wayne Williams
'How to use Windows Sandbox to open files in a secure environment' first appeared in Weekly Tech Insights, a free weekly newsletter that you can sign up to here.