How to install GIMP on Linux Mint 19.3 Tricia

Linux Mint is a great operating system, but with the most recent version (19.3 "Tricia"), there was some shocking news -- GIMP (GNU Image Manipulation Program) was being removed! Crazy, right? I mean, of all of the great software available for Linux, GIMP is one of the best. It is an essential image editing tool that rivals Adobe Photoshop.
So, why did Linux Mint remove it as a pre-installed program? The developers thought the software was too advanced for newer Linux users. While I think that is a bit of nonsense, I can understand why the Mint developers would want to cater to beginners. Thankfully, it is totally easy to install GIMP on a new Linux Mint 19.3 installation.
ALSO READ: Linux Mint 19.3 Tricia is here
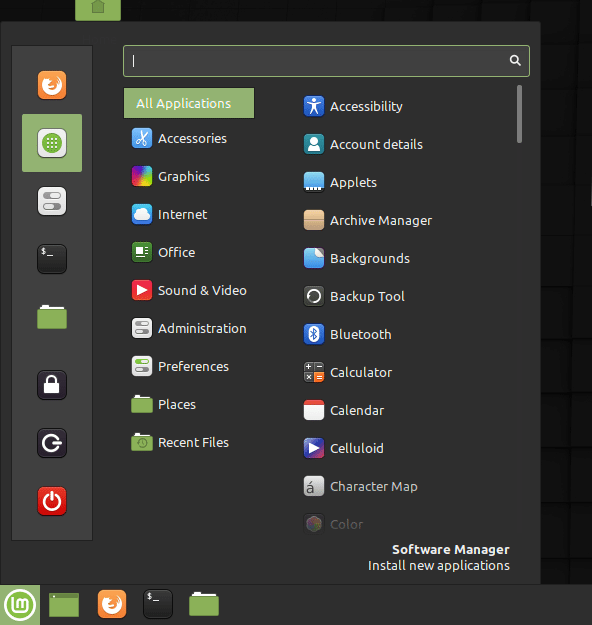
There are two ways to accomplish this -- with Software Manager or Terminal. For many users, the easiest way to install GIMP is with the former, as it uses a graphical interface. To do this, please launch the application menu by clicking the "LM" button on the bottom left of your screen.
Next, please click on the Software Manger icon; it looks like a green circle with 9 dots in the middle. You can see it highlighted in mint green below, directly below the Firefox icon.

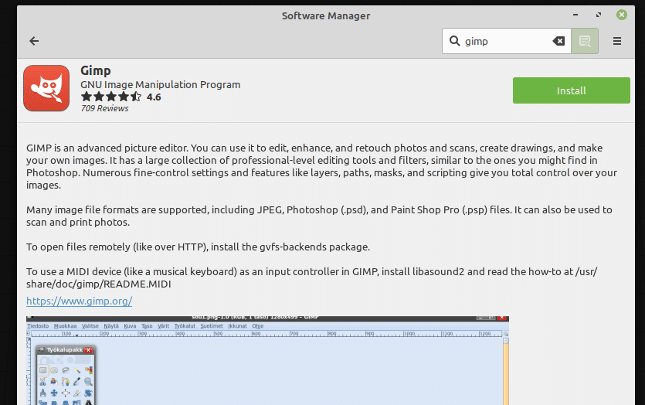
In the search box, you can simply type "GIMP" (without quotes), click on the GIMP program, and then click "Install."

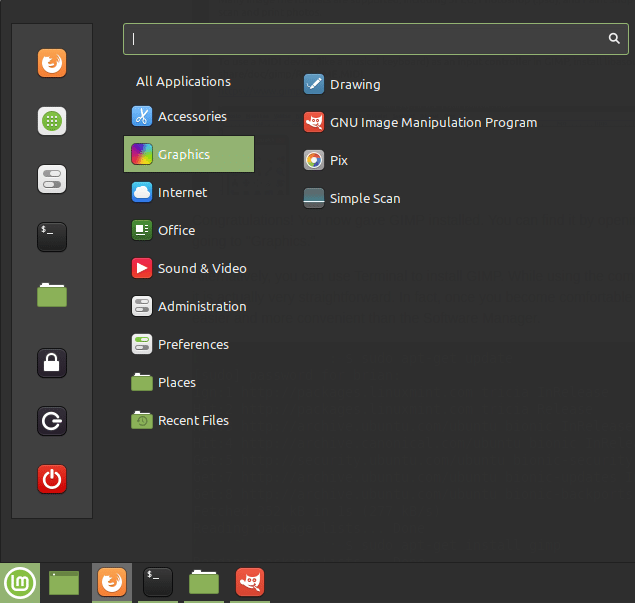
Congratulations! You now gave GIMP installed. You can find it by opening the application menu and going to "Graphics." It is listed as "GNU Image Manipulation Program."

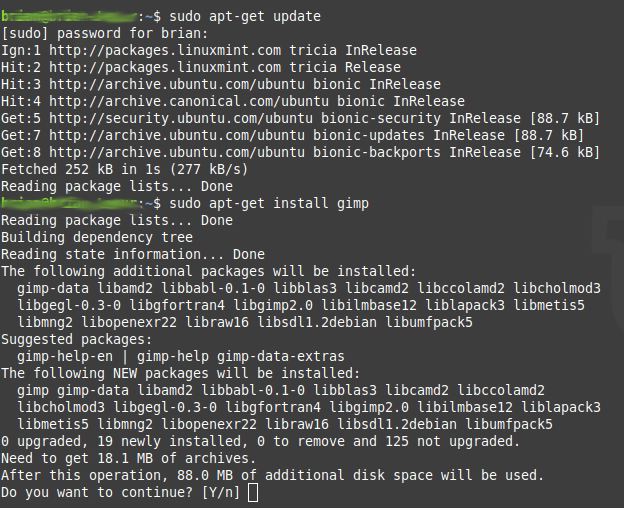
Alternatively, you can use Terminal to install GIMP. While using the command line can be scary for some, it is actually very straightforward. In fact, once you become comfortable using Terminal, you might find it easier and more convenient than the Software Manager.

Simply type in the following commands.
sudo apt-get update [Press Enter]
sudo apt-get install gimp [Press Enter]
Y [Press Enter]
That's it, folks. GIMP is now installed via Terminal.
Image credit: 3Dalia / Shutterstock
