How to rollback and uninstall the Windows 10 May 2019 Update

The Windows 10 May 2019 Update is currently rolling out to users. If you install it and encounter major problems, as some users doubtless will, you might want to go back to your previous version, and wait until the update is a bit less buggy.
The process is straightforward enough, although there are some downsides to be aware of.
SEE ALSO:
- How to check the battery status of Bluetooth devices on Windows 10
- Here are all the features Microsoft removed or deprecated in Windows 10 May 2019 Update
- Force Windows 10 to install the May 2019 Update NOW
- How to download the Windows 10 May 2019 Update and create your own installation USB flash drive or DVD
To uninstall the May 2019 Update, go to Start > Settings and click on Update & Security.
Click the Recovery link on the left and then click on Get started under 'Go back to the previous version of Windows 10.'
Provided you haven’t yet cleared up all the space used by the update, the rollback process will start.
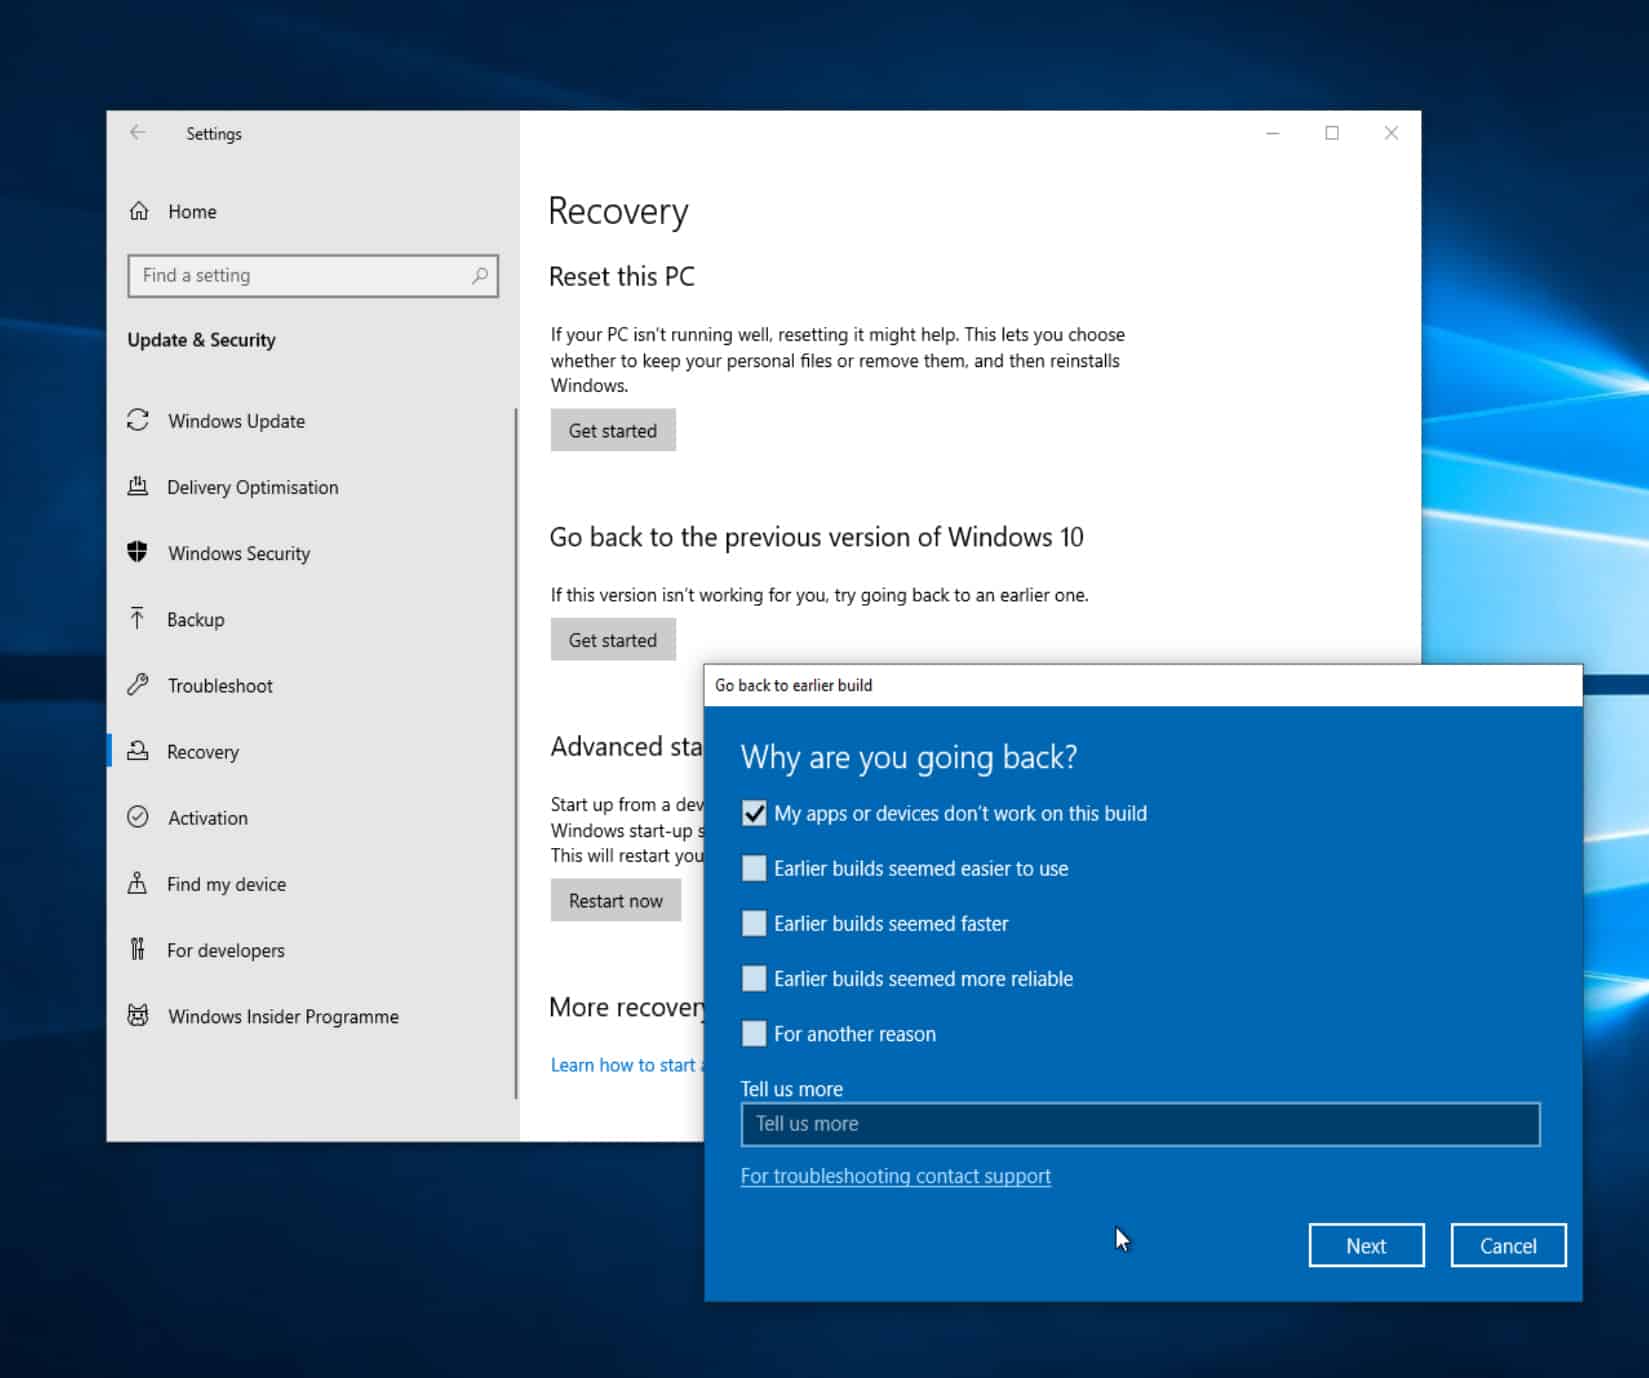
You’ll now be asked why you are going back to the previous build.
You need to select a reason for the Next button to appear, and can also opt to tell Microsoft more about your reasons if you wish.
Bear in mind, if you do revert to a previous build you may need to reinstall some apps and programs, and you will lose any changes you made to Settings after installing the May 2019 Update. You’ll also be advised to backup your files as a precaution.
Before you do go back to the previous version you’ll have the option to check for updates, just in case the problem(s) you’re encountering have since been fixed.
If you’re sure you want to remove the May 2019 Update, click on the Go back to earlier build button and the rollback will begin. Just sit back and wait.
Image Credit: Agenturfotografin / Shutterstock