How to enable Hyper-V in Windows 10 or Windows 11 Home so you can run virtual machines

With the release of the first beta build of Windows 11, increasing numbers of people are keen to try out the operating system. You could install Windows 11 as your primary OS, you could opt to dual boot with Windows 10, or you could just use an old computer (assuming it meets the minimum system requirements).
But perhaps the least disruptive option is to go down the route of virtualization. There are various tools you could use for this, but Windows offers Hyper-V, an optional component that can be used to create virtual machines. Technically, it is exclusive to the Pro editions of Windows 10 and Windows 11, but with a little tweaking, it's also available in the Home editions. Here's how to enable Hyper-V.
See also:
- Microsoft says it will not be possible to bypass Windows 11 system requirements
- Users already have problems with the Windows 11 beta
- Microsoft just made it even easier to install Windows Subsystem for Linux in Windows 11 (and 10)
You will need to have a processor that supports Hyper-V in order to take advantage of it. Rather than checking the specs of your hardware online or in a manual, you can run a checker within Windows to find out.
Just open up Powershell or an elevated Command Prompt from the Start menu and run the command systeminfo.exe
In the informative text that is displayed, look to the Hyper-V requirements section where, hopefully, you will see that your hardware passes muster.
To enable Hyper-V in the Home edition of Windows, launch Notepad and then copy and paste the following into the app:
pushd "%~dp0"
dir /b %SystemRoot%\servicing\Packages\*Hyper-V*.mum >hv.txt
for /f %%i in ('findstr /i . hv.txt 2^>nul') do dism /online /norestart /add-package:"%SystemRoot%\servicing\Packages\%%i"
del hv.txt
Dism /online /enable-feature /featurename:Microsoft-Hyper-V -All /LimitAccess /ALL
Pause
Save the document as a batch file (click File > Save As, select All Files (*.*) from the Save as type drop down menu, and then in the File name box type h-v.bat -- although it is the .bat part that's important; you an use any name you like). Right click the file and select Run as administrator, let the batch file run and then restart Windows.
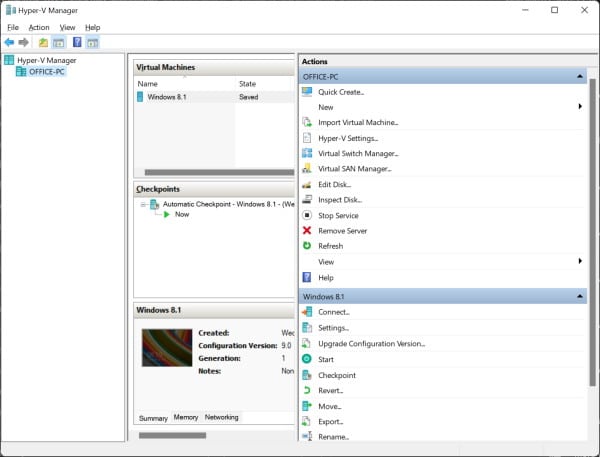
Look in the Start menu, and you'll find a new entry for Hyper-V Manager which you can then use to install and test out various operating systems, from Linux distros to Windows 11.
Note: if you don't see Hyper-V Manager listed in the Start menu, open up Settings and head to Apps. Move to the Optional features section and click More Windows features before checking the options in the Hyper-V section.
Image credit: tomeqs / Shutterstock