How to enable Ultimate Performance power plan in Windows 10

Windows 10 offers a number of power plans you can switch to, depending on your needs. 'Balanced' is the recommended choice, but if you have a high-end system and want to really get the most out of it, it’s worth activating the Ultimate Performance power plan.
This plan is really designed for workstations, but gamers and video editors will benefit from it too. It likely won’t be available to simply switch to on your PC, but you can enable it with this simple hack.
SEE ALSO:
- Windows 10 makes large share gains, while Windows 7 declines significantly
- Nearly three quarters of Windows 10 users still don’t have the October 2018 Update
- Leaked Chromium-based Microsoft Edge works great on Windows 7
- Build 18362 looks to be the Windows 10 1903 Release Candidate
- Windows 10 October 2018 Update finally starts to roll out to all
Firstly, we should state the Ultimate Performance power plan is designed for high-end desktop systems. While you can enable it on a decent laptop it’s not really advisable as it can eat through battery life like no one’s business.
Secondly, you need to be running at least Windows 10 version 1803. Provided you are, follow these steps:
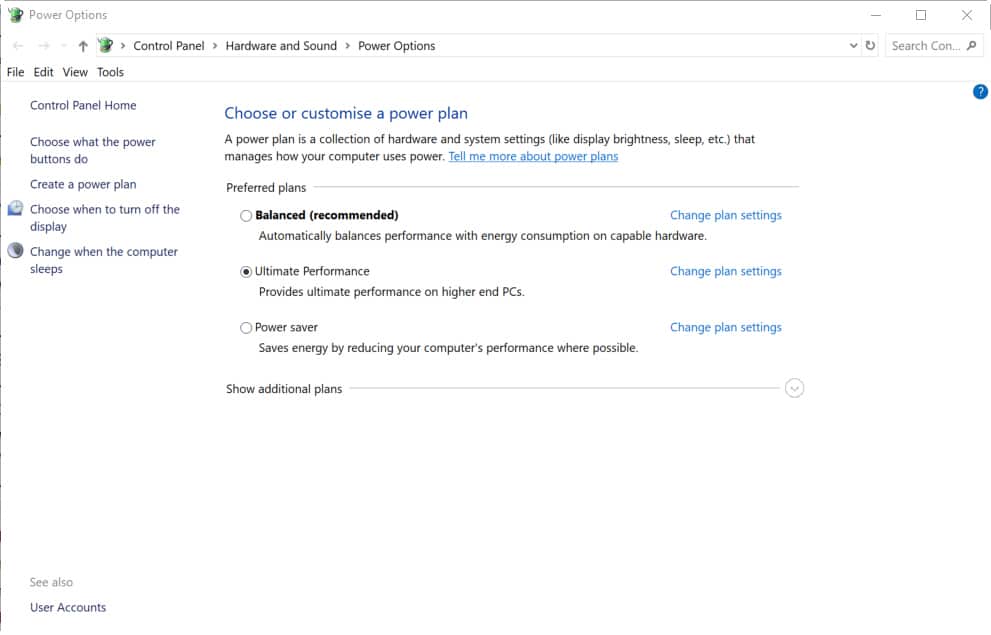
Open Settings >System > Power & sleep and click the Additional power settings link.
Under Choose to customize a power plan, expand the option which says Additional power settings. With luck you should see Ultimate Performance listed, but if not, don’t worry, adding it is straightforward.
Right-click the Start menu and click on Windows Powershell (Admin). In the box that opens type (or copy and paste) the following and hit enter:
powercfg -duplicatescheme e9a42b02-d5df-448d-aa00-03f14749eb61
Go back to the power options screen and repeat the steps. You should now see Ultimate Performance listed and can enable it.
You can further customize the plan, depending on your requirements.
If you want to disable the new plan, go back to Power Options list, and select a different choice.
Photo credit: Alfa Photostudio / Shutterstock