Install Windows 8 on Oracle VirtualBox
 Windows 8 Consumer Preview is a very interesting look at where the operating system is going next, in particular with features like the new Windows app store, but of course it’s also a beta and needs to be treated with caution. Especially as it can’t be uninstalled should things go wrong.
If you only want a quick look round at the Windows 8 highlights, then, the safest approach is to install it on a VirtualBox virtual machine. You won’t have to spend time freeing up a laptop or creating a new partition, and can browse the new Metro interface in a window on your desktop: far more convenient.
And it’s easy to set up, too.
Start by downloading and installing a copy of the latest Oracle VirtualBox. Or, if you have it already, make sure you’ve an up-to-date version (click Help > Check for Updates).
Then download a copy of the Windows 8 Consumer Preview, either the 32-bit or 64-bit edition, depending on which version of Windows you have. (If you’re not sure, click Start, right-click Computer, select Properties and check “System type”.
Launch VirtualBox, and click New > Next to launch the Create New Virtual Machine wizard. Give your virtual machine a meaningful name -- Windows 8 Consumer Preview, presumably -- then choose Microsoft Windows as the operating system, and Windows 8 (or Windows 8 – 64 bit if that’s what you’ve downloaded) as the version.
Click Next, and use the slider to choose how much RAM will be allocated to your VM. Microsoft recommends 1024MB for 32-bit Windows 8, 2048MB for the 64-bit edition, and that’s a reasonable place to start. If performance seems poor you can always allocate more later. Click Next.
Accept the three subsequent default options -- create a new hard disk, in the default VDI format, dynamically allocated -- clicking Next for each.
Now you need to think about the amount of hard drive space you’re willing to allocate to the operating system. Microsoft recommends 16GB for 32-bit Windows 8 and 20GB for 64-bit, but we’d recommend you allow more if you can spare it: 30GB should be more than enough. Click Next.
And that’s it: click Create, and your virtual machine should appear on the list.
Windows Setup
Select your VM, click Settings > Storage, and you’ll see that your virtual system has a single empty optical drive. Choose this, click the disc icon to the right of the dialog box, and select “Choose a virtual CD/DVD disk file”. Point the program at your Consumer Preview ISO file and you’ll see its name now appear under “IDE Controller”, effectively placing your virtual disc in the virtual disc drive.
Now click System in the left-hand list, and choose the Processor tab. Make sure that the “Enable PAE/NX” box is checked, if possible, and click OK.
 And now you’re ready to go. Click Start and your VM should launch, firing up the Windows 8 setup disc. (It may also complain about display properties, and tell you about mouse pointer integration, but after reading those dialogs you can click OK to clear them. Just note that once you’ve clicked inside the VM window it may “grab” your mouse pointer. You won’t be able to remove it again until you press the hotkey, which it Right Ctrl by default.)
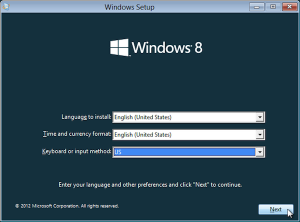
The setup process itself is much like any other Windows installation. So you’ll choose your language, time and currency format and keyboard, first, then click Install and Windows Setup will be launched.
Then you’ll need to enter the product key. According to Microsoft the entire world can use NF32V-Q9P3W-7DR7Y-JGWRW-JFCK8.
The Licence terms appear next; read and accept them (or not).
We were then offered the usual Upgrade or Custom installation options, a little odd as there’s nothing on our VM to upgrade. Choose Custom.
You’ll be asked where you want to install Windows, but as there’s only the single virtual drive you created earlier than that’s not a difficult question. Accept the default option, click Next, and that’s it: the installer will now extract the core Windows 8 files, copy them to their rightful place on your virtual drive, download and install any updates (believe it or not, there are some already) and launch Windows 8.
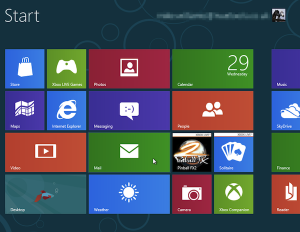
There’s still a little housekeeping to complete, so you’ll be asked to choose your start screen background colour, enter your Microsoft account details and so on, but all the heavy lifting is essentially done: in just a few more clicks you’ll have the full glory of Windows 8 Consumer Preview running in a window on your desktop. Good work -- it’s time to go exploring.